Table of Contents
ToggleSetting up a standing desk isn’t just about buying a desk and hoping for the best, it’s about creating a workspace that supports your back, keeps your workflow smooth, and honestly, makes you want to actually work from home. Whether you’re converting a spare bedroom, reclaiming unused corner space, or overhauling an existing office, the right standing desk setup can boost productivity while reducing the strain of sitting all day. The good news? You don’t need a magazine-worthy space or a five-figure budget to make it work. Let’s walk through seven practical setups that homeowners and DIY enthusiasts can build or configure themselves.
Key Takeaways
- A standing desk setup requires strategic planning around ergonomics, layout, and budget rather than expensive equipment—focus on desk height, monitor positioning, and anti-fatigue mats to prevent strain.
- Minimize visual clutter and maximize floor space by using wall-mounted shelving, monitor arms, and cable management, keeping only essential peripherals on your work surface.
- Dual-monitor or L-shaped standing desk configurations boost productivity by creating dedicated zones for multitasking, with monitors positioned 20–26 inches at 15–20 degrees offset to reduce neck strain.
- Budget-friendly standing desk options like IKEA hacks, milk crate bases, or basic electric frames ($300–500) paired with affordable custom tops deliver functionality without premium pricing.
- Proper ergonomics—including a 24×36-inch anti-fatigue mat, keyboard tray at elbow height, and 4000–5000K lighting positioned 12–18 inches to the side of your monitor—are essential to comfort and injury prevention.
- Test your standing desk setup for a week and adjust desk height, monitor angle, and lighting based on your unique workflow and space constraints before making permanent decisions.
Minimalist Standing Desk Layout
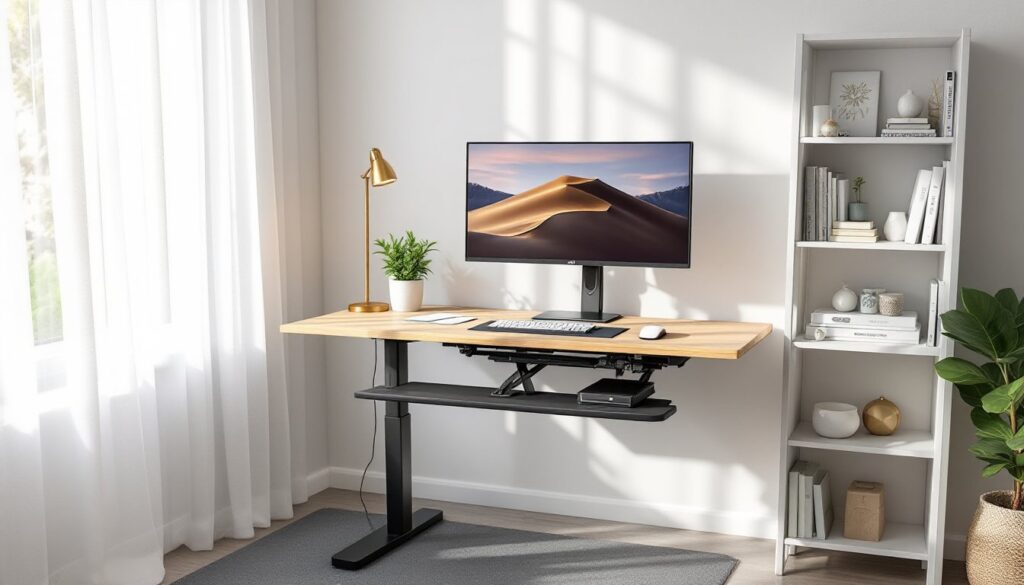
A minimalist setup strips away everything except what you actually use. Start with a simple adjustable desk base (electric or manual crank) paired with a solid 24-inch-deep top, this depth keeps your monitor at arm’s length without hogging floor space. Pair it with a single-leg desk pad or a standing mat (roughly 20 x 30 inches) to reduce fatigue on your feet.
This setup works best in tight spaces or when you’re sharing a room. Keep only your monitor, keyboard, and mouse on the desk surface: store everything else in wall-mounted shelves or a small rolling cabinet you can tuck away. The payoff? Less visual clutter, easier to clean, and zero temptation to pile projects on your work surface. Mount a monitor arm on the desk to free up surface area and fine-tune screen height, your eyes should land on the top third of the monitor when you’re standing naturally.
Corner Workstation with Storage Solutions
Corner spaces often go unused because they’re awkward, not anymore. Install a corner desk or create one by securing two rectangular surfaces at a right angle using L-shaped brackets and lag bolts anchored to wall studs. A 36 x 48-inch L-shape gives you plenty of room without dominating the corner.
Pair this with floor-to-ceiling wall-mounted shelving (using toggle bolts or studs for load-bearing support) to maximize vertical storage. Keep reference materials, office supplies, and personal items at eye level: reserve lower shelves for less-used items. Add a floating shelf above the desk at about 16 inches clearance for a monitor, printer, or small decor. The corner setup naturally creates boundaries in an open room, and the shelving keeps essentials within arm’s reach. Pro tip: Use the corner’s wall space for cable management channels to keep power cords and USB lines organized and out of sight.
Dual-Monitor Setup for Maximum Productivity
If you multitask or reference multiple windows, two monitors are a game-changer. Position them side-by-side at roughly 90 degrees apart on adjustable monitor arms to avoid neck strain. Each screen should be 20-26 inches (measured diagonally): avoid going oversized or you’ll spend your day bobbing your head like an owl.
Mount the arms directly to the desk using a VESA-compliant clamp (check your monitor’s VESA pattern, usually 75 x 75 mm or 100 x 100 mm). This frees desk surface and lets you reposition screens as needed. Keep your primary monitor straight ahead and angle the second monitor at 15-20 degrees off to one side. Place your keyboard and mouse in the center between both screens so your arms stay neutral. Use a cable raceway under the desk to bundle power and display cables, messy cables distract and take up desk space. This setup typically requires more desk depth, aim for at least 30 inches.
L-Shaped Desk Configuration
An L-shaped desk gives you dedicated zones: one side for your computer and work surface, the other for writing, sketching, or paperwork. You can buy a pre-made L-desk or build one using a pencil rail top (typically 3/4 inch thick) and standard desk legs. Many DIYers source affordable components from sites featuring woodworking project plans or free DIY furniture plans that cover basic L-desk assembly.
Size it to fit your room: a common build is 60 inches on the long return and 36 inches on the short return, with a 24-inch depth across both sides. Use a galvanized steel or powder-coated metal base to keep it lightweight yet sturdy. Install your monitor arm and primary peripherals on the main section: use the return for secondary tasks. Position your chair at the corner junction so you can rotate between both work zones without standing and resetting. This layout maximizes corner-to-corner reach and works well for home offices where you juggle computer and analog work.
Ergonomic Accessories and Lighting Essentials
Ergonomics aren’t an afterthought, they’re the difference between a standing desk that helps and one that hurts. Invest in an anti-fatigue standing mat (24 x 36 inches or larger) with a 0.5-1 inch foam core to cushion your feet. Pair it with an adjustable keyboard tray mounted 2-4 inches below elbow height to keep your wrists neutral. Your forearms should stay parallel to the floor when typing: slouching or reaching causes repetitive strain injury.
Lighting matters just as much. Position a desk lamp at 15-18 inches height and 12-18 inches to the side of your monitor to avoid glare and shadows. Choose a 4000-5000K color temperature (neutral to cool white) for focus: warm light (under 3000K) causes eye fatigue during screen work. If your standing desk sits near a window, use a light-blocking shade or sheer curtain to control daylight glare on your monitor. A monitor light bar mounted above your screen adds indirect ambient light without requiring desk space. Finally, add a monitor arm with tilt and swivel so you can dial in the perfect 20-degree downward angle from eye level, the industry standard for reduced neck strain.
Budget-Friendly DIY Standing Desk Ideas
You don’t need to drop $1,000+ on a standing desk system. Start with a basic electric or manual crank base (available for $300-500) and a solid wood or laminate top you source yourself. A 48 x 24-inch oak or pine desktop costs $100-200 at most home centers: sand and finish it with a clear polyurethane for durability.
Alternatively, hack existing IKEA furniture. Their IDASEN frame pairs well with custom tops, or use a creative IKEA modification to retrofit a standard desk with a motorized lift. Stack milk crates or wooden storage cubes as a base, then top them with a sturdy 3/4-inch plywood sheet for a fixed-height standing platform (usually 36-40 inches high). This works if you stand all day and don’t need adjustability. For about $100-150 in materials and a couple hours of work, you’ve got a functional standing desk. Use adjustable monitor arms (often cheaper than a motorized base) to fine-tune screen height and reduce strain. The key is starting simple: build or buy a base that works, then add ergonomic accessories over time as your budget allows.
Conclusion
A standing desk setup is personal, what works for a graphic designer differs from a writer’s needs. Pick a layout that matches your space, workflow, and budget, then invest time in ergonomics: desk height, monitor angle, lighting, and a good mat. Start simple, test it for a week, and adjust. Your back, neck, and productivity will thank you.