Table of Contents
ToggleA deck is only as good as what surrounds it. While most homeowners focus on railings and decking material, the vertical surfaces, the walls and screens that frame your outdoor living space, deserve just as much attention. Whether you’re looking to add privacy, boost curb appeal, or create an outdoor room that extends your home’s style, deck wall ideas can completely transform how your space feels and functions. From modern cladding to living walls dripping with greenery, here are seven approaches that work for different budgets, styles, and maintenance levels.
Key Takeaways
- Living walls and vertical gardens transform deck walls with lush greenery while requiring consistent watering, drainage systems, and pest management for optimal results.
- Modern shiplap and wood cladding create clean contemporary deck wall aesthetics using cedar, engineered boards, or fiber-cement with proper moisture barriers and corrosion-resistant fasteners.
- Stone and brick accent walls add timeless appeal at $8–$25 per square foot installed, but require proper backing, exterior-grade mortar, and periodic repointing to maintain durability.
- Metal screening and privacy panels offer decorative solutions that maintain airflow while creating privacy, with costs ranging from $100–$300 per panel depending on pattern and finish.
- Paint and stain finishes provide cost-effective deck wall transformations ($40–$80 for 200 square feet), with exterior-grade products requiring proper prep, priming, and two coats for lasting durability.
- Strategic lighting integration through LED sconces, string lights, and uplighting extends deck wall functionality into evening hours while creating ambient atmosphere and focal points.
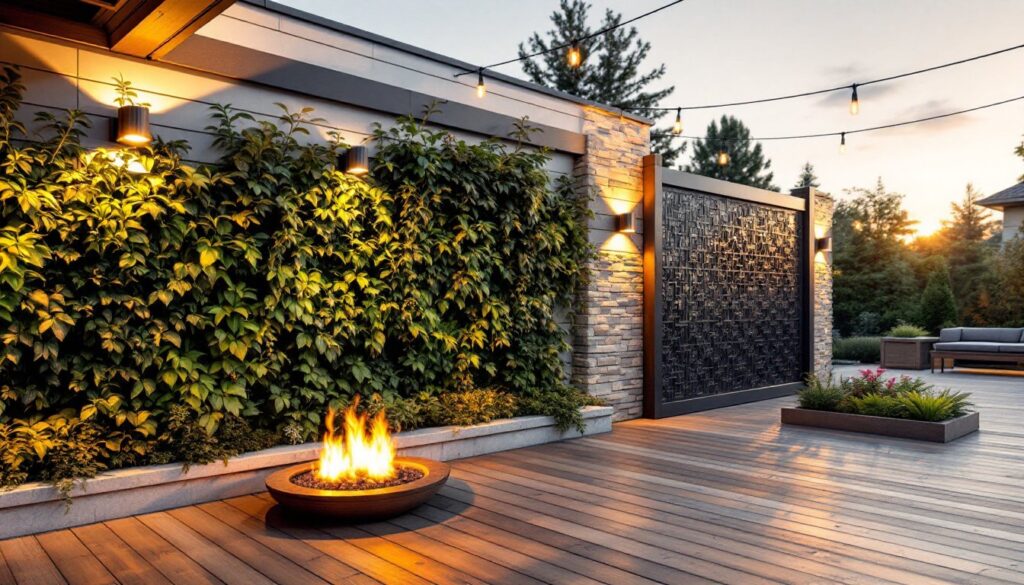
Living Wall and Vertical Gardens
A living wall brings life, literally, to an otherwise blank deck surface. Whether you’re mounting climbing vines like clematis or ivy, installing a modular green wall system, or hanging planters packed with herbs and succulents, vertical gardens soften hard edges and create a lush, inviting atmosphere.
Start simple with heavy-duty wall planters (at least 3–4 inches deep for root development) mounted directly to deck walls or posts. Make sure whatever surface you’re attaching to can handle the weight: a water-soaked planter can easily exceed 10 pounds per linear foot. If mounting to vinyl or composite siding, use corrosion-resistant fasteners spaced every 16 inches.
For a more substantial installation, consider modular green wall systems using felt-lined pockets or cellular trays. These require a sturdy backing, proper drainage (critical, water must escape without rotting the wall), and an irrigation plan. Drip lines or soaker hoses work well: hand-watering won’t cut it in full sun. Plant selection matters: go with shade-tolerant species like ferns and ivy if your wall faces north, or heat-lovers like sedums if it’s south-facing.
The maintenance here is real. You’re committing to watering, occasional feeding, pruning dead growth, and pest management. But the payoff, shade reduction, insulation value, visual softness, is worth it. Gardenista explores outdoor living spaces where living walls are increasingly featured as focal points.
Modern Shiplap and Wood Cladding
Shiplap, those horizontally overlapped boards with a distinctive profile, has become a go-to for creating a clean, contemporary deck wall. Unlike vertical siding, shiplap can add rhythm and visual interest without feeling fussy.
You can use solid wood (cedar, pine, or redwood) for authentic character, or engineered boards (like fiber-cement or vinyl-wrapped composites) if budget and maintenance are concerns. Nominal 1×8 or 1×10 boards work well: actual dimensions are roughly ¾ × 7¼ or ¾ × 9¼ inches. Install over a moisture barrier and proper framing, typically 16-inch on-center studs for residential deck walls.
Prep is everything. Run shiplap boards through an acclimation period (at least two weeks in your climate) before installation so they settle to their final moisture content. Stagger joints to avoid visual weak points. Secure each board with corrosion-resistant fasteners (stainless steel or coated), three per board where it crosses a stud.
For finish, modern aesthetics favor either board-and-batten detailing (vertical battens over the shiplap) or a clean painted look. If staining, test on scrap first, wood tone varies wildly. Primer and two coats of exterior paint typically cost $15–$25 per gallon and cover about 350 square feet per gallon. Fine Homebuilding’s construction guides offer deeper dives into siding installation and finishing.
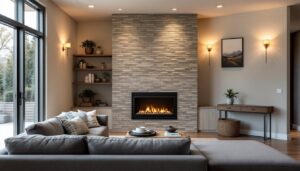
Stone and Brick Accent Walls
Stone or brick instantly adds mass, texture, and timeless appeal. A full masonry wall is overkill for most decks, but a stone or brick veneer accent, covering one section or a feature wall, creates real visual impact without the structural commitment.
Veneer brick and stone veneer panels are lightweight alternatives to solid masonry. Veneer runs $8–$15 per square foot installed: real stone starts around $20 and climbs quickly depending on type and finish. Installation requires a stable backing, moisture control, and proper mortar or thin-set adhesive rated for exterior use.
Before you install anything, confirm the supporting wall can handle the added weight. A 100-square-foot stone veneer wall can weigh 1,000+ pounds. If it’s mounted to vinyl siding or OSB, you may need to remove that first and install to solid framing or a concrete backing board rated for the load.
Grout and mortar are your control points. Use exterior-grade mortar and keep joint width consistent, typically ½ inch. Finish joints flush or slightly recessed to shed water: proud joints trap moisture and fail faster. Seal the stone and grout after curing (typically 28 days) with an exterior masonry sealer: reapply every 3–5 years depending on traffic and weather.
Maintenance involves the occasional repointing of failed joints and washing to remove algae or mildew, especially in damp climates. But the durability, brick and stone last decades with minimal decay, makes it a solid long-term choice.
Metal Screening and Privacy Panels
Metal screens offer privacy without completely blocking air and light. Aluminum, steel, or copper screens can be custom-fabricated or purchased as prefab panels, letting you dial in the aesthetic you want.
Decorative Metal Designs
Cut-steel or perforated metal panels come in dozens of patterns, geometric grids, botanical silhouettes, abstract designs. They’re lightweight, durable, and perfect for creating sightlines that obscure neighbors while maintaining airflow and dappled light. Perforated steel typically costs $100–$300 per 4×8 panel depending on pattern and finish.
Install panels over a simple frame, standard 2×4 studs work, spaced 16 inches apart. Use stainless steel or hot-dipped galvanized fasteners to prevent rust staining. If the panels are powder-coated, inspect annually for scratches or chipping that expose bare metal: touch up with rust-preventative paint.
Rustic copper or weathered steel screens develop natural patinas and don’t require repainting. If you prefer a consistent finish, choose anodized aluminum (low-maintenance) or epoxy-coated steel. Expect to spend 3–4 hours installing an 8×12 screen wall, plus time for framing if starting from scratch.
Metal screens work well paired with lighting, position a sconce or string lights behind the screen to cast dramatic shadows at night. This approach combines function with theater, turning a privacy element into a design feature.
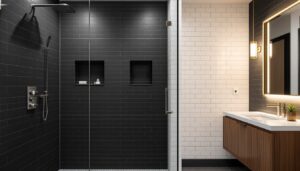
Paint and Stain Finishes
Sometimes the simplest solution is the best one. A well-chosen paint or stain color transforms an ugly fence or cinder-block wall without structural changes.
Exterior-grade paint comes in traditional latex (water-based) or acrylic, both of which handle UV and moisture better than interior paint. Coverage is roughly 350–400 square feet per gallon at one coat: plan for two coats to achieve color depth and durability. A typical deck wall of 200 square feet costs $40–$80 in materials alone.
Prep work determines success. Pressure wash the surface (use 1,500 PSI or less to avoid damage: test on an inconspicuous spot first), let it dry fully, and sand any loose paint or rough spots. Prime bare wood or previously unpainted surfaces, skipping primer leads to poor adhesion and blotchy color. Apply primer and two finish coats, waiting the recommended dry time between coats (usually 3–4 hours in dry conditions).
Color choice depends on your deck’s surroundings. A mid-tone gray or taupe hides dirt and complements most landscaping. Deep forest greens or charcoal blacks provide drama but show dust. Pale colors (white, cream) feel open but require frequent washing in shaded, moist areas where mildew thrives.
For wood surfaces, exterior stains offer an alternative. Semi-transparent stains let wood grain show while adding color and UV protection: solid stains behave more like paint. Stain reapplication is typically needed every 2–3 years versus 5–7 years for paint, so factor maintenance into your decision. Fix This Build That provides detailed project planning for finishing decisions and tool selection.
Lighting Integration for Ambiance
Great deck walls deserve great lighting. Incorporate LED sconces, string lights, uplighting, or recessed step lights into your wall design to extend usability into evening and create mood.
LED sconces mounted at eye level (roughly 60 inches from the deck surface) cast even light without harsh shadows. Aim for warm color temperature (2700K or below) to avoid that harsh, institutional feel. Plan for one sconce per 8–10 linear feet of wall.
String lights (bistro or Edison-style bulbs) draped overhead or woven through a living wall create instant coziness. Solar options exist but are generally under-powered for actual task lighting: hybrid systems (solar + low-voltage LED) offer better value. Budget $200–$500 for professional low-voltage installation if you’re not comfortable running wire.
Recessed or surface-mounted uplighting behind plants or metalwork creates drama and makes your wall a focal point at night. Position fixtures at ground level, angled upward to graze texture and shadow.
Always check local electrical codes before installing anything. Most deck lighting requires GFCI (ground-fault circuit interrupter) protection. If you’re running new circuits, pull a permit, it’s worth the peace of mind. Low-voltage (12V) systems are safer and easier for DIY work than 120V: hire a licensed electrician if you’re unsure.