Table of Contents
ToggleA black backsplash commands attention the moment you walk into a kitchen. It’s bold, sophisticated, and surprisingly versatile, capable of anchoring a minimalist space or elevating a warm, eclectic design. Whether you’re drawn to sleek subway tiles, natural stone, or unexpected textures, black backsplash ideas offer homeowners and DIY enthusiasts a chance to make a statement without overhauling the entire room. In 2026, dark backsplashes continue trending upward among design-conscious renovators. This guide walks you through modern black backsplash styles, installation fundamentals, and practical maintenance considerations so you can confidently execute the look in your own kitchen.
Key Takeaways
- Black backsplash ideas offer bold aesthetic appeal while hiding grease and water splashes better than light tiles, making them both stylish and practical for modern kitchens.
- Matte black subway tiles in herringbone or vertical stack patterns provide contemporary, durable options that won’t date quickly, while natural stone adds organic character but requires more maintenance.
- Proper lighting is essential with black backsplashes—layer task, ambient, and accent lighting with under-cabinet LED strips to prevent the space from feeling cramped and to highlight your design.
- Pair black backsplashes with light countertops, white cabinetry, or metallic fixtures to create visual balance and prevent a cave-like aesthetic.
- DIY installation requires meticulous substrate preparation and careful grouting, but is achievable for confident homeowners who invest time in proper technique and maintenance.
Why Black Backsplashes Are the Ultimate Kitchen Design Trend
Black backsplashes work because they solve multiple design challenges at once. They hide grease and water splashes better than light tiles, they ground a busy kitchen visually, and they pair well with virtually any cabinet color or countertop material. A black backsplash behind white cabinetry creates high contrast and contemporary edge: the same backsplash behind warm wood tones adds depth and sophistication.
From a functional standpoint, black also performs well in kitchens with open shelving or pass-throughs. It draws the eye to your workspace rather than competing with other design elements. Resale value is another practical consideration: neutral cabinets paired with a striking black backsplash appeal to a broader buyer pool than trendy accent walls or pastels that date quickly.
The trend isn’t just about aesthetics. Many homeowners appreciate that black backsplashes require less frequent deep cleaning than white or light gray tiles, and fingerprints and minor water stains are far less visible. If you’re considering a backsplash upgrade, black offers both immediate visual impact and practical durability.
Sleek Subway Tiles and Contemporary Patterns
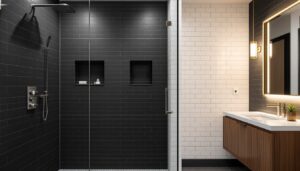
Subway tiles remain the workhorse of kitchen backsplashes. A classic 3-inch-by-6-inch (nominal) subway tile in matte black creates a clean, Scandinavian-inspired look that won’t feel dated in five years. Matte finishes hide grout lines and water spots better than glossy tiles, which is why they’re favored in professional kitchens.
For a more dynamic approach, consider running subway tiles in a herringbone or vertical stack pattern instead of the standard horizontal layout. Herringbone requires more precision cuts and slightly more grout but creates movement and visual interest. A vertical stack straightens the eye upward, making smaller kitchens feel taller.
If solid black feels too heavy, try a black subway tile with subtle variations, a slight sheen or texture on the surface, or mix in thin grout lines of contrasting color. White grout lines (at least 3/16 inch wide) pop against black tile and feel intentional: gray grout reads more seamless. Pattern options also extend to penny tiles, hexagons, or elongated 1-by-6 formats, though installation complexity and labor costs rise accordingly. Many DIYers find standard subway tile the sweet spot for their first backsplash project.
Natural Stone and Textured Finishes
Natural stone backsplashes, marble, slate, or granite, in black tones bring organic character that manufactured tile can’t replicate. Each stone has unique veining, surface variation, and tactile qualities. Black marble, for instance, often features white or gray veining that catches light and adds visual complexity: slate tiles have a naturally matte, slightly uneven surface that feels artisanal and forgiving about minor imperfections.
But, natural stone requires honest conversation about maintenance. Stone is porous: it stains and etches unless properly sealed. Marble in particular is susceptible to acid damage from lemon juice or vinegar, so it’s best suited to kitchens where backsplash splash is minimal. Slate is hardier but still needs an annual sealer application. If you love the look but worry about upkeep, engineered stone or porcelain tiles that mimic natural stone offer similar aesthetics with less fuss.
Textured finishes, whether hammered, rippled, or hand-molded tiles, add depth and shadow play. A matte black backsplash with subtle surface texture is less austere than flat tile and pairs beautifully with warm lighting. Installation is straightforward since most textured tiles are standard sizes, but grouting irregular surfaces takes patience and a steady hand to avoid excess grout buildup in crevices.
Mixing Black With Contrasting Materials and Accent Colors
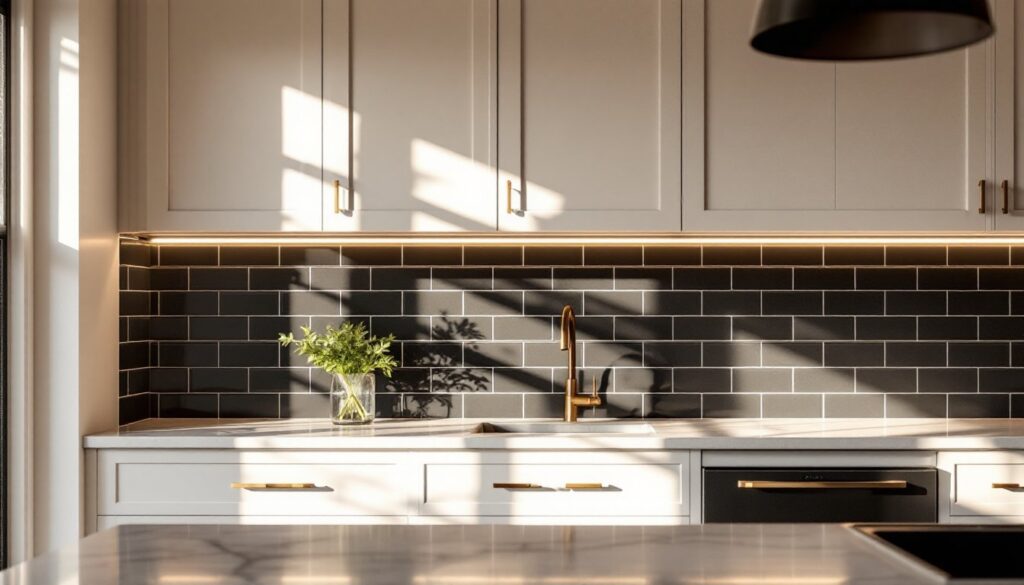
A pure black backsplash can feel monolithic if your entire kitchen runs dark. Smart mixing creates visual breathing room. For example, pair a black tile backsplash with white quartz or light wood countertops and a light wall color above the backsplash to avoid a cave-like feeling. Brass, gold, or copper fixtures and hardware add warmth and prevent black from reading cold.
Another approach: introduce accent tiles within the black field. A black subway tile backsplash punctuated with one accent row of metallic, white, or deep green tiles draws attention and breaks visual monotony. This works especially well if your accent tile picks up a color from your cookware, art, or textiles elsewhere in the kitchen.
Material mixing is equally effective. Combine black tiles in a lower backsplash with open shelving or glass upper cabinets to keep the upper zone light and airy. Or run black tile alongside white subway tile in a split pattern, half black, half white, for a bold, contemporary statement. Real-world examples from design publications show kitchens with dark backsplashes often succeed by balancing dark surfaces with light fixtures, countertops, and wall color. The key is intentionality: choose contrasts that reflect your home’s overall palette and natural light.
Lighting Considerations for Black Backsplash Kitchens
Black absorbs light, so adequate task and ambient lighting becomes essential. A kitchen with a black backsplash but dim overhead lighting will feel cramped and unwelcoming. Instead, layer your lighting: task lighting (under-cabinet LED strips), ambient lighting (ceiling fixtures or recessed lights), and accent lighting (pendant lights or track lights above or to the sides of the backsplash).
Under-cabinet LED strips (warm white, 2700K color temperature) are especially practical. They illuminate countertops for food prep and bounce light off the black backsplash, adding depth and preventing the backsplash from becoming a visual void. Many LED strips install with simple adhesive backing and plug into a nearby outlet or hardwired junction box, well within DIY capability for most homeowners.
Position overhead lights to avoid creating shadows on the countertop and workspace. Recessed lights directly above the backsplash work well if positioned at least 18 inches from the wall to prevent harsh glare on the tile. Pendant lights hung 30–36 inches above the countertop add style and functional light. If your kitchen receives good natural light from a window, the black backsplash becomes a stunning focal point rather than a dark void. Test your kitchen’s light levels before committing to black tile: walk through at different times of day to ensure the space feels comfortable.
DIY Installation Tips and Maintenance Guide
Installing a black backsplash is achievable for confident DIYers, though substrate prep and grouting demand patience. First, the surface must be clean, smooth, and flat. Remove existing tile or paint, fill gaps and holes, and prime with backsplash primer (moisture-resistant). Use a straightedge to check for low or high spots: fill depressions with thinset mortar or lightweight spackling compound, then sand smooth. This step is non-negotiable, gaps and unevenness compound as you tile upward and lead to lippage (uneven tile edges) and eventual grout cracking.
For tile installation, gather: notched trowel (typically 1/4-inch square notch for small tiles, 1/2-inch for larger tiles), thin-set mortar (white or gray, depending on grout color), grout, margin trowel, tile spacers, wet saw or tile cutter, and sponges. Wear safety glasses and a dust mask if cutting tile. Mark a level line on the wall to guide your first row, many installers start 1 inch above the counter, which allows backsplash to meet countertop naturally.
Spread thinset with the notched trowel at a 45-degree angle in small sections. Press tiles firmly, using spacers for consistent grout joints. Let thinset cure per manufacturer guidance (usually 24 hours). Grout next: mix grout to a peanut butter consistency, work it diagonally across tiles with a grout float, then wipe excess after 15–20 minutes with a damp sponge. Multiple passes keep grout haze minimal on the tile surface.
Maintenance is simple. Wipe spills promptly with a damp cloth to prevent water spots on matte finishes. Use a pH-neutral cleaner: avoid vinegar or acidic products on natural stone. Reseal stone backsplashes annually or per product instructions. Most tile backsplashes benefit from sealing grout joints every 1–2 years to prevent staining and moisture penetration. You can do this yourself with a commercial grout sealer and a small brush, about 1–2 hours of work per kitchen.
Conclusion
A black backsplash transforms your kitchen’s aesthetic and function without the cost or disruption of a full remodel. Whether you choose sleek subway tiles, textured stone, or mixed materials, the key is balancing black’s visual weight with adequate lighting, strategic color accents, and thoughtful material pairings. For DIY installation, prioritize substrate prep and take time with grouting, these hidden steps determine longevity. Explore diverse black backsplash ideas and professional kitchens to refine your vision, then commit to the project with confidence.