Table of Contents
ToggleCorner showers have become a go-to solution for homeowners working with limited bathroom space. By anchoring a shower to the corner of a room, you free up wall footage and create the illusion of more breathing room, even in tight quarters. A well-designed corner shower combines function with visual appeal, turning a utilitarian fixture into a focal point that adds real value to a home. Whether you’re renovating a guest bath, master suite, or working within a rental’s constraints, corner shower remodels offer flexibility, smart storage options, and design options that punch above their modest footprint.
Key Takeaways
- Corner shower remodel designs maximize space in small bathrooms by using existing walls at a 90-degree angle, freeing up floor footage without disrupting plumbing runs.
- Frameless or semi-frameless glass enclosures and tile-niche combinations are the top modern corner shower styles, with frameless units costing $1,200–$2,500 but offering a premium, soap-scum-resistant finish.
- Proper waterproofing at corner seams is non-negotiable—use liquid-applied or sheet membranes before tiling, and choose epoxy or urethane-based grout to prevent hidden water damage.
- Install a properly sized exhaust fan (60+ CFM for most bathrooms) ducted to the outside with a backdraft damper, combined with recessed ceiling lights at least 3 feet from the shower curb, to prevent mold and ensure safety compliance.
- Budget-conscious corner shower remodels succeed by prioritizing structural integrity and waterproofing first, then choosing stock tile sizes and semi-framed glass enclosures over premium finishes to reduce costs by up to 30%.
Why Corner Showers Make Smart Space-Saving Solutions
A corner shower positioned at a 90-degree angle uses two existing walls, which means you’re not eating into open floor space the way a traditional alcove might. This layout works especially well in bathrooms under 50 square feet, common in older homes and apartments, where every inch matters.
Corner placement also simplifies plumbing runs. Both the drain and supply lines can route along the existing framing without extensive rework. If you’re dealing with concrete slab or second-floor bathrooms where access is tricky, this matters. You’ll spend less on labor and materials compared to moving a shower to a new location.
From a design standpoint, corner showers draw the eye upward and outward. A tall glass enclosure or open corner niche visually expands the room by keeping sightlines clear. Contrast that with a clunky fiberglass unit or an opaque surround, it chops up the space and makes things feel cramped.
One honest point: corner showers require precise waterproofing at the seams where two walls meet. You can’t fake this. Poor sealing leads to hidden water damage inside the wall cavity, which becomes expensive later. The payoff, though, is a durable, efficient layout that works whether your bathroom is a cozy master or a small guest space.
Modern Corner Shower Designs for Every Style
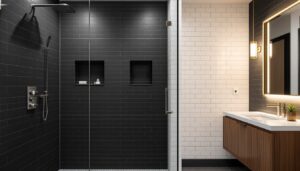
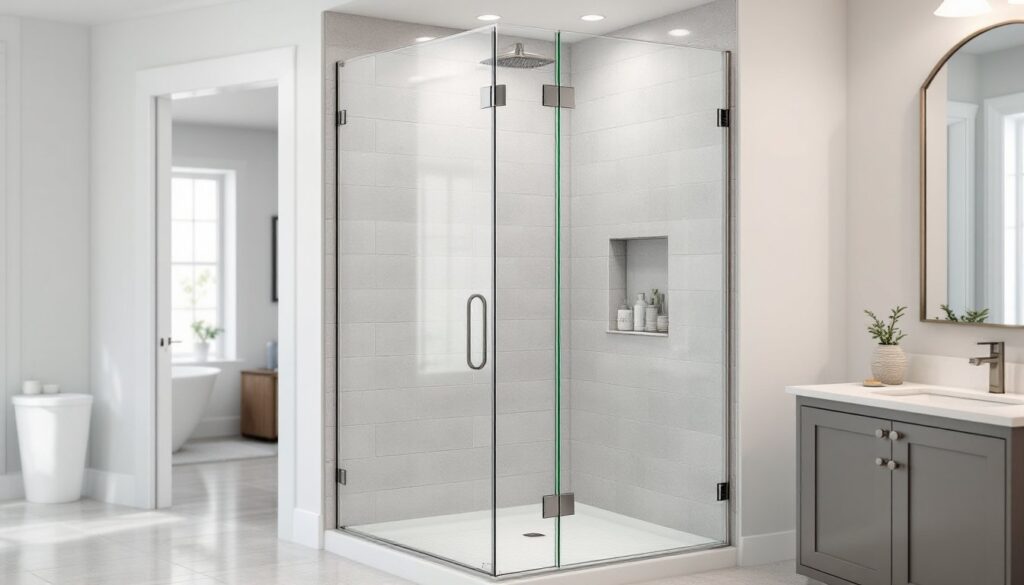
Contemporary Glass Enclosures
Frameless or semi-frameless glass enclosures are the default choice in 2026. They’re clean, modern, and let you show off tile or wall finishes without visual clutter. A frameless glass door (typically 3/8-inch tempered glass) hinges from one wall and swings open, creating an unobstructed entry. Frameless units cost more upfront, roughly $1,200 to $2,500 for materials and installation, but they feel premium and resist the soap scum buildup that framed aluminum enclosures accumulate.
Neotile angles are gaining traction in corner showers. Rather than straight walls, a diagonal corner entry uses two angled glass panels meeting at 45 degrees. This approach opens sight lines even more and accommodates awkward corner geometry. Installation requires custom framing and precise glass cuts, so factor in higher labor costs and a few extra weeks for the shop order.
For a budget-conscious glass option, consider a semi-framed corner enclosure with a thin aluminum or stainless steel profile. It costs less than frameless, is easier to install, and still reads modern. The tradeoff is a thin frame line running along edges, minimal visual impact, but present.
Glass enclosures demand good ventilation. Install an exhaust fan rated for at least 60 CFM (cubic feet per minute) ducted to the outside, not into the attic. Humidity trapped behind glass leads to mold and condensation issues. If you live in a humid climate, consider a ventilation fan with humidity sensor that runs automatically when moisture spikes.
Tile and Niche Combinations
Tile-heavy corner showers with integrated niches offer a crafted, intentional look. Subway tile, 2×2 mosaics, and large-format porcelain (12×24 inches or larger) all work in corner installations. The key is planning your layout so you’re not left with slivers of tile at the corner seams, that’s where amateur tilers stumble.
A corner niche (a recessed shelf built into the shower wall during framing) solves clutter and adds visual interest. Frame a niche about 12 inches wide by 14 inches tall by 5 inches deep into the studs before you waterproof. Tile around it, and you’ve got a built-in spot for soap and shampoo. Niches also break up tile patterns, giving your eye a resting point.
For waterproofing behind tile in a corner shower, use liquid-applied membranes or sheet membranes rated for wet areas. Tile alone doesn’t stop water intrusion: the membrane does. Apply it to both walls before setting tile, paying extra attention to the corner seam where walls meet. This is where most leaks happen.
Large-format tile (12×24 or 18×36 inches) reduces grout joints, which means fewer places for water to seep through. It also reads more contemporary. Set tile with a quality modified thin-set mortar rated for wet areas, never use drywall mud or generic mortar. Grout should be epoxy or urethane-based for corners: ordinary cement-based grout breaks down over time under constant spray.
Lighting and Ventilation Upgrades
Showers are dark by nature, enclosed spaces, limited window access, and glass or tile that don’t transmit much light. A corner shower needs deliberate lighting strategy. Recessed lights (3-inch or 4-inch trim) installed in the ceiling above the corner deliver task lighting without glare. Space them at least 3 feet away from the shower curb to keep them out of direct spray. Install them on a dedicated circuit with a moisture-rated switch, code requires GFCI (ground fault circuit interrupter) protection for any outlet within 6 feet of a water source, and the same principle applies to ceiling fixtures over showers.
For accent lighting, a niche sconce or LED strip mounted inside a corner shelf or along the top of the glass enclosure adds ambiance and can improve visibility. These are lower-power, decorative additions, not primary light sources, so they’re less critical from a code standpoint, but they still need to be vapor-sealed and moisture-rated.
Ventilation is where many remodels fail. A corner shower with good light but poor ventilation builds mold within months. Your exhaust fan should be sized for the bathroom volume: a 5×8 bathroom needs at least 40 CFM: larger baths need 60+ CFM. Duct the fan straight outside, not into the attic, soffit, or crawlspace. A flexible aluminum duct run is fine, but insulated ducting reduces condensation inside the duct itself.
Install the exhaust outlet on the roof or exterior wall, never on a soffit (water runs back down into the ducting). A damper-backdraft valve on the outlet prevents cold air from flowing back in when the fan isn’t running. Many builders skip this: don’t. It’s a $15 part that saves headaches.
Consider a humidity-sensor fan switch or a timer switch set for 20-30 minutes post-shower. Continuous bathroom ventilation is ideal, but if budget is tight, a timed or sensor-driven fan hits a middle ground: it runs when needed without wasting energy.
Budget-Friendly Corner Shower Remodel Tips
If cost is your primary constraint, focus on good bones first: proper waterproofing, solid plumbing, and structural integrity. Skimp on tile finish later if needed, poor waterproofing or plumbing shows up as expensive water damage that far exceeds the original remodel cost.
Keep the footprint. Changing drain location or relocating hot/cold supply lines adds labor and material costs fast. A standard 32×32-inch corner shower stall or a slightly larger custom frame following existing plumbing lines keeps costs predictable.
Choose accessible materials. Stock tile sizes (12×24, 2×2 mosaics) cost less and install faster than custom shapes or imported stone. A white or light gray subway tile or porcelain base never dates and hides soap scum better than dark surfaces. Pair it with a darker grout or accent band for visual interest without the premium.
Frameless glass is lovely but expensive. A semi-framed corner enclosure or even a heavy-duty anodized aluminum frame with clear tempered glass costs half as much, lasts just as long, and reads clean and modern. Performance matters more than prestige.
Skip the fancy showerhead initially. A solid dual-outlet trim set with a rainfall showerhead runs $150–$400 depending on finish. Many mid-range options are solid, don’t assume you need a luxury spa system. A diverter valve lets you switch between head spray and handheld without replacing fixtures later.
Lighting and ventilation are non-negotiable, but you can source GFCI-protected recessed fixtures and moisture-rated exhaust fans from big-box stores at good prices. A brand name isn’t necessary: proper installation and specs matter more. Studies show homeowners using proper home renovation planning tools reduce budget overruns by up to 30%.
Do the demolition and prep work yourself if you’re able. Removing an old shower, prepping the space, waterproofing, and simple grouting can save labor costs. Tile-setting and plumbing connections are where mistakes happen fast, hiring an experienced tile setter or plumber for those phases pays for itself through quality.
Conclusion
A corner shower remodel is one of the highest-return projects for small-bathroom renovations. It gains usable floor space, simplifies plumbing, and offers endless design flexibility, from minimalist glass enclosures to richly tiled niches. The secret is executing the fundamentals: watertight seals, solid ventilation, and thoughtful lighting. Skip those, and you’ll regret it. Get those right, and your corner shower will serve well for 15+ years with minimal upkeep.