Table of Contents
ToggleThat space under your deck? It’s probably just dirt, shadow, and wasted potential right now. But it doesn’t have to stay that way. The area beneath your elevated deck is one of the most overlooked real estate on a property, it’s naturally sheltered from rain, already framed by structure, and begging for a second life. Whether you’re looking to add functional storage, create an outdoor lounge, or build something your family will actually use, the space under your deck offers surprising possibilities that won’t drain your wallet or require major structural changes. Let’s walk through seven practical ideas to reclaim that shadowy zone and turn it into something worth the effort.
Key Takeaways
- Under the deck ideas transform overlooked shadowy space into functional outdoor living zones with built-in rain protection from the deck structure overhead.
- Proper grading, drainage, and moisture control are essential foundations for any under-deck project, requiring at least a 1-inch slope per 8 feet to direct water away.
- Low-cost solutions like prefabricated storage boxes, LED string lights, and shade-tolerant plants offer immediate value without requiring major structural modifications.
- Hot tub installations demand professional structural engineering verification and licensed electrical work, as water weight and 240-volt circuits present safety-critical considerations.
- Weather protection through perimeter skirting, annual maintenance, and debris management extends the lifespan of your under-deck improvements and prevents mold and rot.
- Layered ambient lighting, weatherproof furniture, and organized storage maximize the space’s usability while maintaining airflow to prevent moisture-related damage.
Create a Covered Outdoor Lounge Area
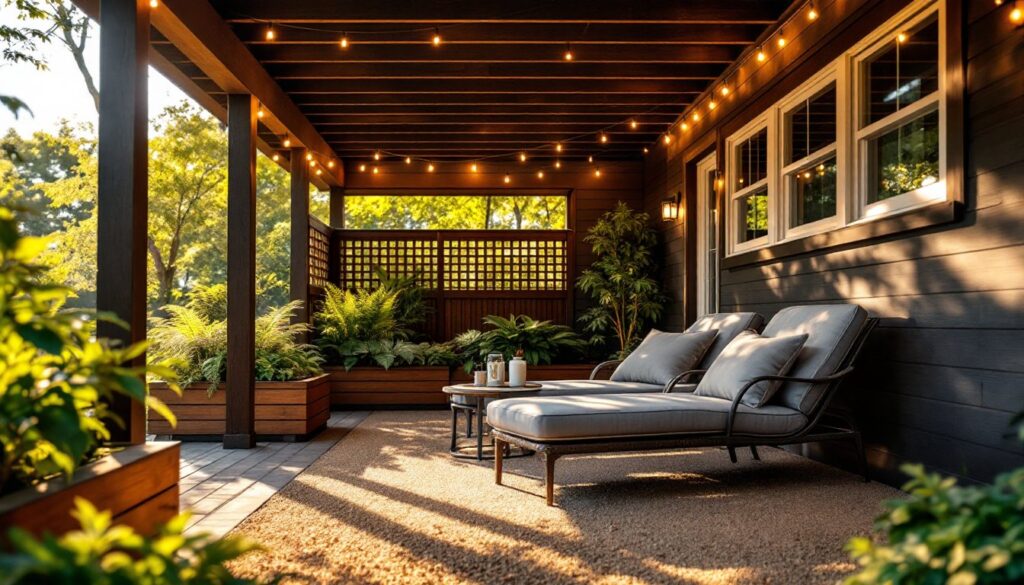
The simplest and most rewarding use of under-deck space is creating a sheltered outdoor living area. Since your deck joists already form a ceiling, you’ve got built-in rain protection, no full roof required. Start by assessing headroom. Most decks sit 4 to 6 feet above grade, which gives you workable height for seating without feeling claustrophobic.
Your first move is grading and drainage. Under-deck space naturally collects water runoff from above, so you need proper slope (at least 1 inch per 8 feet) to direct water away from your lounging zone. Install a layer of gravel or landscape fabric to keep mud and debris under control. If your deck sits very low, consider installing an under-deck ceiling system, these slatted or screened barriers hang beneath the joists, letting water through while keeping debris out of your seating area.
For furniture, stick to outdoor-grade pieces that won’t rot or warp in the damp, shaded environment. Metal frames with waterproof cushions work better than solid wood chairs, which will absorb moisture. A few weatherproof throw pillows and a small side table create an inviting retreat without overcrowding the space. Add a ceiling fan wired to a weatherproof switch to improve air circulation and keep mosquitoes at bay during warm months.
Install Ambient Lighting for an Evening Retreat
Proper lighting transforms an under-deck space from a gloomy hideaway into an actual destination after sunset. Since the space is already sheltered, you have more options than you’d think, and you won’t need heavy-duty weatherproofing for fixtures tucked under the deck framing.
Start with recessed or semi-flush lighting mounted to the underside of the joists. Install GFCI-protected circuits (ground fault circuit interrupter outlets) to meet electrical code for outdoor spaces. Most jurisdictions require GFCI protection within 6 feet of water, so plan accordingly. If you’re not comfortable running electrical, LED string lights or solar stake lights are safe, permit-free alternatives that still create ambiance without the installation headache.
Consider the color temperature. Warm white (2700K) lighting feels more inviting and less institutional than cool white. Dimmable fixtures let you adjust brightness for different moods, bright enough for card games, dimmed for relaxation. Wall-mounted sconces on deck posts or posts you install under the deck add layered lighting without depending on overhead fixtures alone. As with any outdoor electrical work, check local codes: some jurisdictions require a licensed electrician for permanent installations, particularly if running new circuits from your panel.
Build a Functional Storage Solution
Storage is the practical workhorse of under-deck spaces. The dry, protected environment is perfect for seasonal items, gardening tools, and pool equipment that would otherwise clutter your garage or shed.
The simplest approach is a prefabricated deck storage box, these are weatherproof, require no building, and take minutes to set up. For a custom solution that fits your space exactly, build a wooden storage cabinet from pressure-treated lumber. Use 2×4 framing with 3/4-inch plywood sides, securing joints with corrosion-resistant screws (stainless steel or coated varieties won’t rust in the damp environment). Include a sloped roof overhang to shed water, and keep the base elevated at least 4 inches off the ground to allow air circulation and prevent rot. Add magnetic touch latches and lift-off lids so you don’t have to manage traditional hinges in a moisture-prone area.
If you’re building from plans, resources like Instructables and Ana White offer free DIY cabinet designs scaled for under-deck spaces. For organization, use plastic bins inside rather than storing items directly on plywood, bins are easier to retrieve and protect contents if moisture seeps in. Label everything clearly so family members know what’s stored where. Include ventilation holes in cabinet sides to prevent moisture buildup and mold. Aim for at least 1-inch diameter holes spaced every 2 feet.
Design a Shaded Garden or Plant Sanctuary
If you’ve got shade-tolerant plants, the under-deck environment is ideal for hostas, ferns, impatiens, and other species that struggle in full sun. The natural overhead protection from rain means you control watering precisely, no guessing whether the storm watered deeply enough.
Start with a moisture barrier on the ground. Landscape fabric prevents soil from mixing with gravel and keeps weeds minimal. Layer 3 to 4 inches of quality potting soil or garden mix in raised beds built from untreated cedar or composite lumber. Cedar naturally resists rot and looks intentional rather than thrown-together. If building raised beds, use stainless steel or coated corner brackets and fasteners to prevent rust staining on the soil over time.
For permanent plantings, amend your soil with compost annually and mulch to retain moisture. A small drip-irrigation system on a simple timer takes the guesswork out of watering during hot stretches. Hanging planters from the deck joists maximize vertical space and add visual interest. Shade-loving hostas with striking foliage (variegated leaves in green and white, or blue-toned varieties) give you color and texture without flowers. A small water feature, even a ceramic bird bath, adds humidity and creates a focal point. Plan for 1 foot of spacing between plants when mature to ensure airflow and prevent fungal issues in this naturally moist microclimate.
Set Up a Hot Tub or Outdoor Spa Nook
A hot tub under your deck is the ultimate under-utilized space project, it’s protected from the elements, requires minimal additional framing, and turns winter into a destination experience. But there are critical considerations before you commit.
First: structural capacity. Existing deck joists must support not just the tub weight but also the water (240 gallons of water weighs roughly 2,000 pounds). Have a structural engineer verify your deck can handle the load-bearing. This isn’t optional: overloading joists can lead to catastrophic failure. Second, plan electrical access. A typical hot tub requires a dedicated 240-volt circuit, often 50 amps or more, which absolutely requires a licensed electrician and a permit. This isn’t a DIY electrical project, codes exist because people have been electrocuted.
Third, address drainage and moisture control. Install a French drain or gravel bed beneath the tub to redirect water and prevent pooling. Ensure adequate clearance from deck posts and joists for maintenance access. A small footbridge or stepping stones keeps feet dry when entering. For finishing touches, add privacy screens or lattice panels along the sides to shield bathers from view while allowing airflow beneath the deck. A weatherproof storage bench for towels and robes completes the spa vibe. If hot tubs feel too ambitious, an inflatable soaking tub or small plunge pool offers similar appeal with far fewer structural and electrical demands.
Install Weather Protection and Finishing Touches
Whatever you build under your deck, weather protection prolongs its life and your enjoyment. The overhead deck provides some shelter, but side exposure to wind-driven rain and lateral moisture still matters.
Add a skirting system around the perimeter. Lattice panels (vinyl or wood) let air circulate while blocking direct spray and debris. If you want more solid coverage, install vertical tongue-and-groove boards or composite panels. Leave small weep holes or gaps at the base for drainage: standing water leads to mold and structural rot. Paint or stain wood skirting with a water-resistant product rated for exterior use, acrylic latex or oil-based exterior paints both work, but quality outdoor primers prevent peeling and water penetration better than cheap topcoats alone.
For the overhead surfaces, keep deck joists and beams clear of debris and standing water. A stiff brush and garden hose twice yearly prevents moss and mold accumulation. If you install an under-deck ceiling or shade cloth, check it monthly for debris piles that trap moisture. Finally, slope any flat surfaces (shelves, ledges, storage tops) to shed water away from the center. A 5-degree angle is enough to keep water moving.
Maintenance matters. Inspect ground-level structural members annually for rot, especially in spring after winter moisture buildup. Prod pressure-treated lumber with a screwdriver, soft, discolored wood indicates decay. Replace compromised sections immediately before they fail. An annual refresh (resealing wood, repainting trim, checking fasteners) keeps your under-deck space functional and safe.
Conclusion
That shadowy space under your deck isn’t wasted real estate, it’s waiting for you to claim it. Whether you start small with a lounge area and lighting or go all-in with storage and landscaping, a well-designed under-deck zone adds genuine utility and extends your home’s living space year-round. Focus on proper drainage, weatherproofing, and structural integrity from the start, and you’ll build something that works for decades, not seasons.